| 导读 | 这篇文章主要为大家详细介绍了Vue使用echarts定制特殊的仪表盘,文中示例代码介绍的非常详细,具有一定的参考价值,感兴趣的小伙伴们可以参考一下 |
本文实例为大家分享了Vue使用echarts定制特殊仪表盘的具体代码,供大家参考,具体内容如下
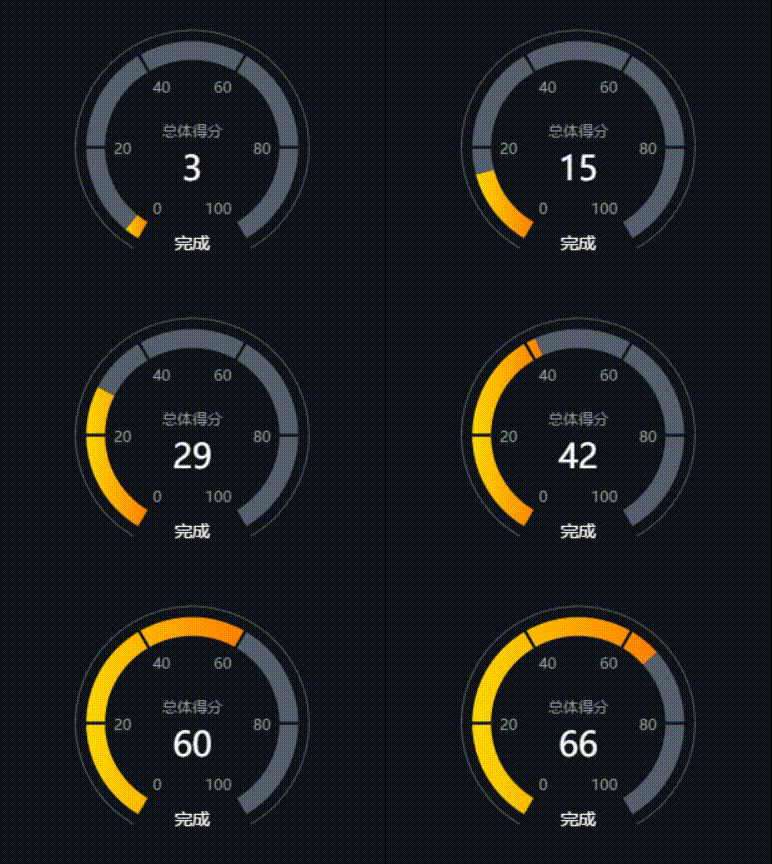
实现的效果:(初始化以及浏览器resize的时候数字和弧形条均为递增动画)

HTML部分:
< !-- 为ECharts准备一个具备大小(宽高)的Dom -->
< div class="main-echarts-contianer"
     ref="main">
< /div>
CSS部分:
.main-echarts-contianer {
  width: 480px;
  height: 320px;
  display: flex;
  align-items: center;
  justify-content: center;
}
JS部分:
drawClockChart () {
  // 指定图表的配置项和数据
  let option = {
    'series': [
      {
        'name': '个人指标',
        'type': 'gauge',
        'radius': '65%',
        'startAngle': '240',
        'endAngle': '-60',
        // 图表的刻度分隔段数
        'splitNumber': 5,
        // 图表的轴线相关
        'axisLine': {
          'show': true,
          'lineStyle': {
            'color': [
              [
                0.9,
                new this.$echarts.graphic.LinearGradient(0, 0, 1, 0, [{
                  offset: 0,
                  color: '#FFD900'
                },
                {
                  offset: 1,
                  color: '#FF8000'
                }
                ])
              ],
              [1, '#56606E']
            ],
            'width': 15
          }
        },
        // 图表的刻度及样式
        'axisTick': {
          'lineStyle': {
            'color': '#0F1318',
            'width': 2
          },
          'length': 15,
          'splitNumber': 1
        },
        // 图表的刻度标签(20、40、60等等)
        'axisLabel': {
          'distance': -8,
          'textStyle': {
            'color': '#9E9E9E'
          }
        },
        // 图表的分割线
        'splitLine': {
          'show': false
        },
        // 图表的指针
        'pointer': {
          'show': false
        },
        // 图表的数据详情
        'detail': {
          'formatter': function (params) {
            return '{title|' + '总体得分}' + '\n' + '{score|' + params + '}'
          },
          'offsetCenter': [0, 0],
          'rich': {
            'title': {
              'fontSize': 12,
              'color': '#9E9E9E',
              'lineHeight': 30
            },
            'score': {
              'fontSize': 27,
              'color': '#fff'
            }
          }
        },
        // 图表的标题
        'title': {
          'offsetCenter': [0, '90%'],
          'color': '#fff',
          'fontSize': 14
        },
        'data': [{
          'name': '完成',
          'value': 31
        }]
      },
      {
        'name': '外层线',
        'type': 'gauge',
        'radius': '72%',
        'startAngle': '240',
        'endAngle': '-60',
        'center': ['50%', '50%'],
        'axisLine': {
          'lineStyle': {
            'width': 1,
            'color': [[1, '#56606E']]
          }
        },
        'splitLine': {
          'length': -6,
          'lineStyle': {
            'opacity': 0
          }
        },
        'axisLabel': {
          'show': false
        },
        'axisTick': {
          'splitNumber': 1,
          'lineStyle': {
            'opacity': 0
          }
        },
        'detail': {
          'show': false
        },
        'pointer': {
          'show': false
        }
      }
    ]
  }
  let tempVal = 0
  clearInterval(this.clockChartTimer)
  this.clockChartTimer = setInterval(() => {
    if (tempVal > this.myIvstrAbility) {
      clearInterval(this.clockChartTimer)
      // 最后转到最终数据的地方
      option.series[0].data[0].value = this.myIvstrAbility
      option.series[0].axisLine.lineStyle.color[0][0] = this.myIvstrAbility / 100
      // 使用刚指定的配置项和数据显示图表
      this.myChart.setOption(option)
      // 初始化渲染完成
      this.renderCompleted = true
      return
    }
    option.series[0].data[0].value = tempVal
    option.series[0].axisLine.lineStyle.color[0][0] = tempVal / 100
    // 使用刚指定的配置项和数据显示图表。
    this.myChart.setOption(option)
    tempVal++
  }, 20)
  // 此处监听浏览器的resize,重新渲染图表
  let that = this
  window.addEventListener("resize", function () {
    clearTimeout(that.resizeTimer)
    that.resizeTimer = setTimeout(() => {
      myChart.resize()
    }, 500)
  })
}
以上就是本文的全部内容,希望对大家的学习有所帮助。
原文来自:
本文地址://q13zd.cn/vue-echarts-java.html编辑:倪家兴,审核员:逄增宝
Linux大全:
Linux系统大全:


